AT&T Voice DNA® Administrator Support
Add or Delete Hunt Group Members
As an AT&T Voice DNA® company or location administrator, you can create and manage hunt groups. You first create a hunt group and determine the hunting policy, and then you add members to it. For more information about hunt groups, see Create Hunt Groups and About Hunt Groups.
A hunt group can include members from any location in your AT&T Voice DNA service. After you create a hunt group, you can add, remove, or change the order of members in the list at any time.
Note: Users can belong to only one member number hunt group at a time. They can belong to one or more standard hunt groups, and to one member number hunt group, at the same time.
To add members to a hunt group
- From the AT&T Voice DNA Administrator Dashboard, select the location of the hunt group you want to edit, and then click View Hunt Groups for this Location. (For help with this step, see Log In and Use Search.)
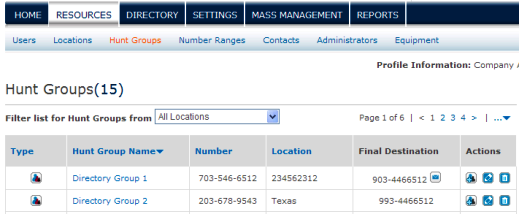
The Hunt Groups page appears.

- Locate the hunt group you want to edit, and then in the hunt group's Actions column, click the Add Members icon
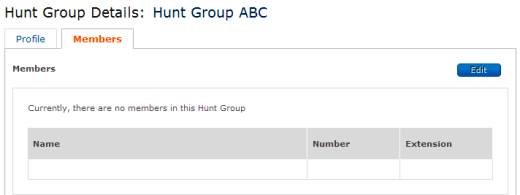
 . The Hunt Group Details page appears with the Members tab selected.
- Click Add Members. The Add Members to Hunt Group window opens, listing all users at the hunt group's location.
- To add members from the current location, select the names of users you want in the hunt group, and then click Add.
- To add members from a different location, select the location from the Select Location list, optionally enter the user’s partial name or phone number in the Name or Number field, and click the Search icon
 . Then select the names of users you want in the hunt group, and then click Add.
The Hunt Group Details page reappears with the Members tab selected.
- Click Save.
To view the members list
- From the AT&T Voice DNA Administrator Dashboard, select the location of the hunt group you want view, and then click View Hunt Groups for this Location. (For help with this step, see Log In and Use Search.) The Hunt Groups page appears.
- Click the name of the hunt group you want to view. The Hunt Group Details page appears with the Profile tab selected.
- Click Members. The Members list appears.

To reorder the member list
- Open the Members list, and then click Edit.
- In the Actions column, click the Reverse current order link
 , or click any of the icons below to manage the list.
| Icon | Action |
|---|---|
| Move member up one row. | |
| Move member to top of list. | |
| Move member down one row. | |
| Move member to bottom of list. | |
| Delete member. |
- When you've finished adding and reordering the hunt group list, click Save. A confirmation message appears.
To delete members from a hunt group
- Open the Members list, and then click Edit.
- Select the member you want to delete.
- In the Actions column, click the Delete icon
 .
.
